Showing posts with label Crafts. Show all posts

Thursday, January 10, 2013

What to do with wine corks ...


I recently saw these wine cork ornaments for sale (after Christmas, of course) and thought I should put together a little wine cork round up. SO many cool things you can do with these guys. 
Pick these up locally from 4th Ave Gardens!


Plus, you don't have to buy your main supply: just drink wine! Although, it would take a ridiculous amount of time to drink this much wine: 


Maybe just buy them in bulk ...

More cork projects here!

Monday, April 16, 2012

Guest Blog: Give Old Books a Second, Light Filled Life

My friend Emily and I made resolutions to be more crafty. We had a good run with T-shirt scarves, dabbled in wreath making and now, she's moved on to decoupage. And doing well - well enough to be featured in Charleston City Paper! So here's her craft and how-to. They turned out really lovely.


The Charleston Friends of the Library receive donations of used books, CDs, and DVDs at all 16 branches of the Charleston County Library system. We then use these items to sell at our book sales throughout the year and online at www.shopcharlestonlibraryfriends.org to fundraise for library programming. In some cases, the books receive are damaged with mold, missing covers, or are just simply not in sellable condition, so we have to recycle the leftovers.
I enjoy finding homes for these books that don’t meet our standards. One of my favorite crafts involves using book pages to make into candle-lit jars. They’re great for display on mantles, book shelves, and dining room tables.
Materials Needed
Glass jars (make sure they’re large enough for your candles)
Old book pages
Mod Podge (craft adhesive)
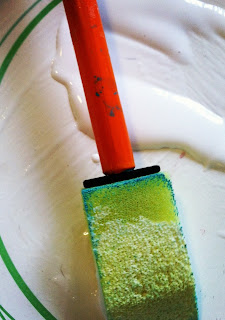
Paintbrush/sponge
Instructions
1. Rinse out the jars and remove the labels. I put my jars in a large bowl with warm water and let them soak for a couple of hours. Some scrubbing might be involved, but not much.
 2. Pick out the old book pages you’d like to use and then size them to fit your jar by tearing the pages. I left the edges jagged. 
 3. Place your jar on a flat surface. I used a paper plate to easily rotate the jar during the process. Coat the side of the book page you’d like to stick to the jar with a paintbrush or sponge using Mod Podge while placing it on the jar. Add an extra coat of Mod Podge on the outside of the book pages after you’ve glued them to the jar to make them extra durable.
 4. Let your jars dry for a few hours. I used a brown paper bag as my drying base.
 5. You can add extra design to the book pages if you’d like. I used a paintbrush to add some color to the existing text. 
6. Put the candles in the jar and display!
Really, really pretty - and not too hard. Or full of supplies you probably don't have. No excuses for not making these! I've done this with tissue paper in the past for holidays. The tissue paper with patterns on it works best - you can cut out tons of hearts or Christmas trees or Happy Birthdays and overlap them to make inexpensive and festive holiday decorations. Check out pretty paper here
Emily Everett is the Director of Charleston Friends of the Library, a great non-profit that funds over 4000 programs sponsored by the library. They also do the Big Book Sales - which are AWESOME. I cannot get enough paperback fiction (for $1!) and I rack up on children's books ($2-4) for my niece. You should definitely shop, donate and support! Memberships are only $20 - you can sign up here!

Thursday, February 2, 2012

Rosettes

One of my resolutions was to create more this year, so I've spent a bit of time looking for things I could make - things that don't require I purchase a vast amount of supplies or spend hours on them.  Starting small.  In my searching, I've noticed a trend - rosettes.  These things are everywhere and used in so many ways!  So here is my attempt at creating them.  

Basic directions:  Find a book you don't care about anymore - you're going to need the pages.  You'll need to cut the top off to make a square out of each page.  Then draw a spiral taking up the entire square.


Starting from the edge of the page, cut along the spiral you drew.


Again, starting from the edge of the paper, roll the pages toward the center.  How tight or loose is up to you.  Mine actually loosened up quite a bit as I was securing them with hot glue.  Which is the last step - just dab some hot glue on the circle left at the end, press your rosette down and voila!


Some are prettier than others.  But my plan is to eventually have enough to make the wreath below, so a individual not-so-pretty guys won't be noticed.

Source
It's going to be fairly time consuming.  But here are a few of the things I can do from here:

Source
Source
Change up what you use - ribbon, fabric, paper, felt, etc - to create a variety of things.  Jewelry, decoration, gift wrap, centerpieces - so much!  You can also change the edges of the material for additional styles.


Source
Source
Source
I love these paper ones.  Would be perfect for a wedding - and could save you quite a bit.

Source
Feel free to post your own rosette inspirations!

Sunday, January 8, 2012

DIY: Table Number

The fact that I am married - and have been married over 2 years - does little to discourage me from having my own wedding pinterest page.  Maybe women have just been programmed to love all things wedding.  It's probably more all things pretty.  Or all things sparkly.  Can't help it.

One of the things I find myself drawn to are creative ways to number your reception tables.  There are so many ways to make this personal to your life, tie in to your theme or give your guests some insight into your relationship.  And most of these you can do yourself.

Source

Source
Source

Maybe Charleston's obsession with cocktails has influenced me, but I love the use of glass and wine bottles as table markers.  The wine bottles below are pretty and basic.  You could also spray paint them with chalk paint and write the numbers on. 


Source


I love the idea below.  Each table is named after the couple's favorite books.  I have a friend who works for the library and there are SO MANY great literary themed wedding ideas.  Garland hearts made of book pages.  A bouquet made with paper roses.  It goes on and on.

Source
Source
And balloons!  Definitely no longer considered tacky for weddings.  You can do amazing things with balloons for the reception.  Or for engagement photos.  Or Save the Dates.  Maybe a good future post topic ...

Source

Saturday, January 7, 2012

New Year's Resolution: Get Organized

If your New Year's Eve resolution was to get organized, this post is for you.  There are so many easy (and gorgeous) ways to get that jewelry box/closet/bathroom/kitchen together.  You'll feel better.  Your house will look better.  And maybe you'll have pulled double duty on resolutions - get organized = get crafty!

For jewelry:

Source
Source
Source


Source
Source
Source


For the closet:

For the bathroom:

Source
Source
That's enough for one day.  I think the magnetic make up board may be the first to try ...